Android 7.0 Wifi Is Disconnecting and Connecting Over and Over Again
This browser is no longer supported.
Upgrade to Microsoft Edge to accept reward of the latest features, security updates, and technical back up.
Fix Up Device for Development
This article explains how to setup an Android device and connect information technology to a computer so that the device may be used to run and debug Xamarin.Android applications.
Afterwards testing on an Android emulator, you will desire to meet and examination your apps running on an Android device. Y'all volition demand to enable debugging and connect the device to the reckoner.
Each of these steps will be covered in more than detail in the sections below.
Enable Debugging on the Device
A device must be enabled for debugging in order to test an Android application. Programmer options on Android have been hidden by default since version four.2, and enabling them can vary based on the Android version.
Android 9.0+
For Android 9.0 and higher, debugging is enabled by following these steps:
- Get to the Settings screen.
- Select Nigh Phone .
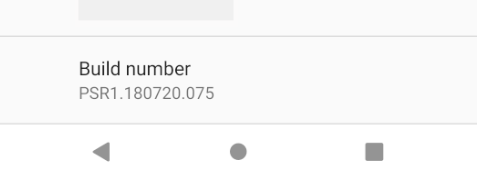
- Tap Build Number 7 times until You are now a developer! is visible.
Android 8.0 and Android viii.1
- Become to the Settings screen.
- Select Organization.
- Select About Phone
- Tap Build Number vii times until Y'all are now a developer! is visible.
Android 7.ane and lower
- Go to the Settings screen.
- Select About Phone.
- Tap Build Number 7 times until Y'all are now a developer! is visible.
Verify that USB debugging is enabled
After enabling developer mode on your device, you must ensure that USB debugging is enabled on the device. This also varies based on the Android version.
Android 9.0+
Navigate to Settings > Organisation > Advanced > Developer Options and enable USB Debugging.
Android eight.0 and Android 8.1
Navigate to Settings > Arrangement > Developer Options and enable USB Debugging.
Android vii.1 and lower
Navigate to Settings > Developer Options and enable USB Debugging.
One time the Developer Options tab is available nether Settings > System, open information technology to reveal developer settings:
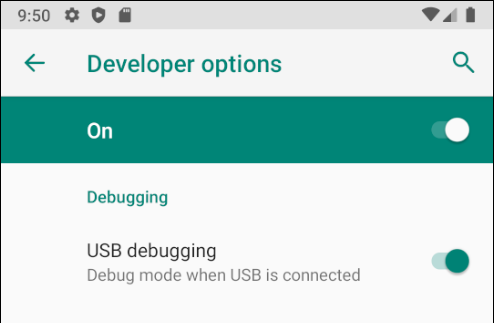
This is the identify to enable developer options such as USB debugging and stay awake mode.
Connect the device to the computer
The final step is to connect the device to the computer. The easiest and about reliable way is to do so over USB.
Yous will receive a prompt to trust the computer on your device if you take not used it for debugging earlier. You tin too check Ever permit from this computer to prevent requiring this prompt each time you connect the device.

Alternate connection via Wifi
It is possible to connect an Android device to a figurer without using a USB cable, over WiFi. This technique requires more than try simply could be useful when the device is too far from the calculator to remain constantly plugged-in via cable.
Connecting over WiFi
By default, the Android Debug Bridge (ADB) is configured to communicate with an Android device via USB. It is possible to reconfigure it to use TCP/IP instead of USB. To practice this, both the device and the computer must be on the same WiFi network. To setup your surround to debug over WiFi complete the post-obit steps from the command line:
-
Determine the IP address of your Android device. Ane fashion to find out the IP address is to await nether Settings > Network & internet > Wi-Fi, then tap on the WiFi network that the device is continued to, and so tap on Advanced. This will open a dropdown showing data nigh the network connection, similar to what is seen in the screenshot below:
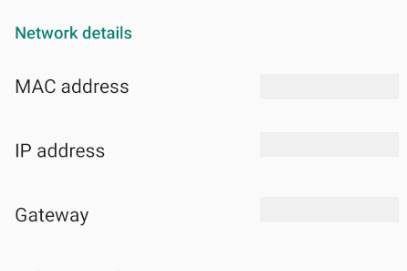
On some versions of Android the IP accost won't be listed there but tin be found instead nether Settings > Virtually phone > Condition.
-
Connect your Android device to your estimator via USB.
-
Next, restart ADB so that information technology using TCP on port 5555. From a command prompt, blazon the following control:
adb tcpip 5555After this command is issued, your reckoner will not be able to listen to devices that are continued via USB.
-
Disconnect the USB cable connecting your device to your computer.
-
Configure ADB so that it will connect to your Android device on the port that was specified in stride 1 above:
adb connect 192.168.i.28:5555Once this command finishes the Android device is connected to the calculator via WiFi.
When you're finished debugging via WiFi, it's possible to reset ADB dorsum to USB way with the following command:
adb usbIt's possible to request ADB to list the devices that are continued to the calculator. Regardless of how the devices are continued, you tin can issue the post-obit command at the control prompt to see what is connected:
adb devices
Troubleshooting
In some cases you might find that your device cannot connect to the figurer. In this case y'all may desire to verify that USB drivers are installed.
Install USB Drivers
This step is not necessary for macOS; just connect the device to the Mac with a USB cable.
It may be necessary to install some extra drivers earlier a Windows reckoner volition recognize an Android device connected by USB.
Note
These are the steps to set upwardly a Google Nexus device and are provided as a reference. Steps for your specific device may vary, merely volition follow a similar pattern. Search the internet for your device if you have trouble.
Run the android.bat application in the [Android SDK install path]\tools directory. Past default, the Xamarin.Android installer will put the Android SDK in post-obit location on a Windows calculator:
C:\Users\[username]\AppData\Local\Android\android-sdk
Download the USB Drivers
Google Nexus devices (with the exception of the Milky way Nexus) require the Google USB Driver. The driver for the Galaxy Nexus is distributed by Samsung. All other Android devices should employ the USB driver from their respective manufacturer.
Install the Google USB Commuter package by starting the Android SDK Manager, and expanding the Extras folder, every bit can be seen in the follow screenshot:
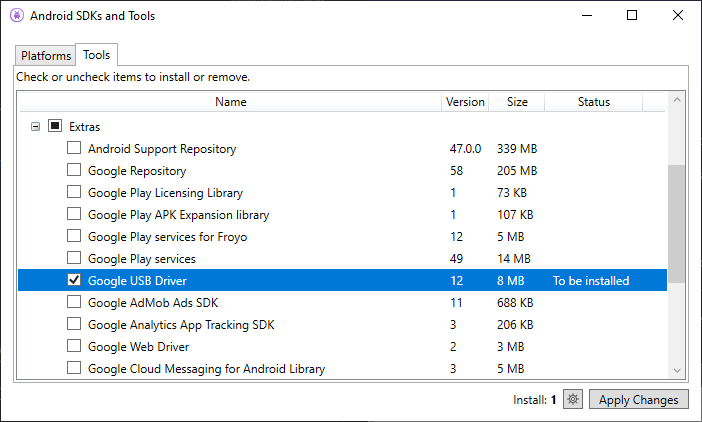
Check the Google USB Driver box, and click the Apply Changes button. The commuter files are downloaded to the following location:
[Android SDK install path]\extras\google\usb\_driver
The default path for a Xamarin.Android installation is:
C:\Users\[username]\AppData\Local\Android\android-sdk\extras\google\usb_driver
Installing the USB Driver
After the USB drivers are downloaded, it is necessary to install them. To install the drivers on Windows 7:
-
Connect your device to the computer with a USB cablevision.
-
Correct-click on the Computer from your desktop or Windows Explorer, and select Manage .
-
Select Devices in the left pane.
-
Locate and expand Other Devices in the right pane.
-
Correct-click the device proper noun and select Update Driver Software . This will launch the Hardware Update Magician.
-
Select Browse my computer for commuter software and click Next .
-
Click Browse and locate the USB driver binder (the Google USB driver is located in [Android SDK install path]\extras\google\usb_driver).
-
Click Adjacent to install the commuter.
Summary
This commodity discussed how to configure an Android device for evolution by enabling debugging on the device. It as well covered how to connect the device to a computer using either USB or WiFi.
- Android Debug Bridge
- Using Hardware Devices
- Samsung Driver Downloads
- OEM USB Drivers
- Google USB Driver
- XDA Developers : Windows 8 - ADB/fastboot driver problem solved
Source: https://docs.microsoft.com/en-us/xamarin/android/get-started/installation/set-up-device-for-development
0 Response to "Android 7.0 Wifi Is Disconnecting and Connecting Over and Over Again"
Post a Comment